In this document you can find information on how to manage your online store powered by WooCommerce. Click the links below to take you directly to what you are looking for or just start from the beginning!
Now for the fun stuff, adding your products! But before diving into your first product, you should familiarize yourself with how product categories, tags and attributes work.
Categories, Categories and tags work in much the same way as any other post type categories and tags. They can be applied before or during the creation of a product.
Attributes, on the other hand, are different – they can be added per product, or you can set up global attributes for the entire store to use (for example, in layered navigation).
To learn more, see: Managing Product Categories, Tags and Attributes
Product Types With attributes and categories set up and stock management configured, we can begin adding products. When adding your product, the first thing to decide is what type of product it is.
The Simple product type covers the vast majority of any products you may sell.Simple products are shipped and have no options. For example, a can of drink.
A Grouped product is a collection of related products which can be purchased individually and can only consist of simple products. For example, a PS3 could be a grouped product as there are 80GB, 120GB and 200GB variations of that same parent product.
An External or Affiliate product is one that you list and describe on your website, but is sold elsewhere.
A Variable product is a product that has different variations, each of which may have a different SKU, price, stock options etc. For example, a t-shirt available in several different colors and/or sizes.
Adding a simple product
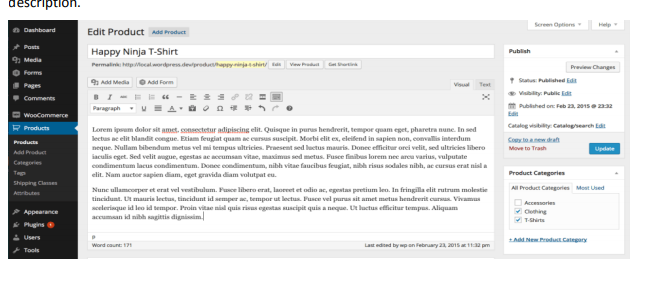
Adding a simple product is a straightforward process and similar to authoring a standard
WordPress post. In the Products menu, click Add Product. You will be presented with a
familiar interface and should immediately see where to type the product title and full
description.
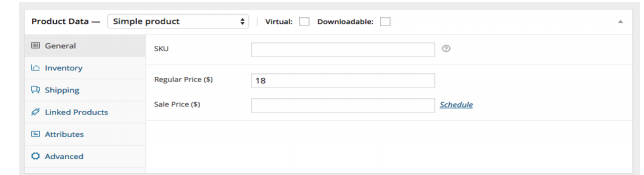
Product data
Next is the Product Data tab set. This is where the majority of the product data is input.
Product data is added from this panel
General tab
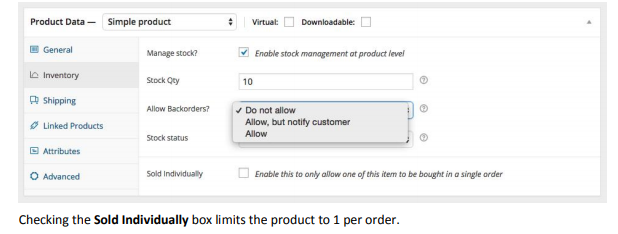
Inventory tab
The inventory tab allows you to manage stock for the product individually and define
whether to allow back orders. If stock management is disabled from the settings page, only
the ‘stock status’ option will be visible.
Shipping tab
Linked Products tab
Using up-sells and cross-sells you can cross promote your products with one another. They
can be added by searching for a particular product and selecting the product from the
dropdown list:
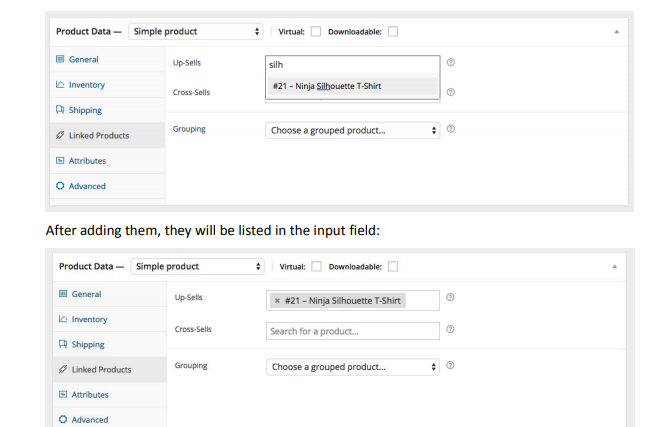
Cross-sells are products that are displayed with the cart and related to the user’s cart
contents. As an example, if the user adds a Nintendo DS to their cart, you may want to
suggest they purchase spare Styluses when the arrive at the cart page.
Grouping – Set this option to make a product part of a grouped product.
Attributes tab
On the attributes tab, you can assign attributes to a product. You will see a select box
containing global attribute sets you created (e.g., platform). See Managing Product
Categories, Tags and Attributes for help on setting these up.
Once you have chosen an attribute from the select box, click add and you can apply the
terms attached to that attribute (e.g., Nintendo DS) to the product. You can hide the
attribute on the frontend by leaving the visible checkbox unticked.
Custom attributes can also be applied by choosing ‘Custom product attribute’ from the
select box. These are added at the product level and won’t be available in the layered
navigation.
Advanced tab
Excerpt
Finally, you can add an excerpt that should be a short product description. Typically this
appears next to the product imagery on the listing page, and the long description appears in
the Product Description tab.
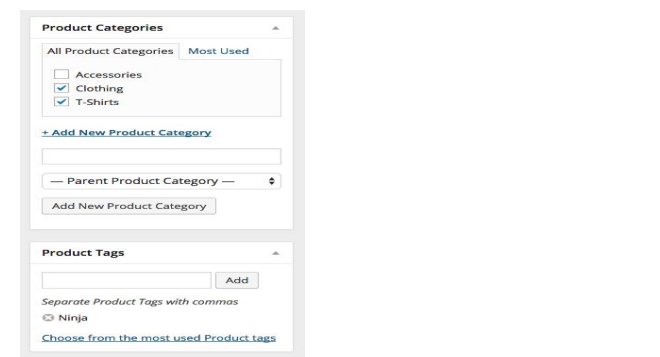
Taxonomies
On the right hand side of the Add New Product panel, there are product categories in which
you can place your product, similar to a standard WordPress post. You can also assign
product tags in the same manner.
Product images
You can add both a main image and a gallery of images
The featured image
The featured post image is the main image for your product. It is the image which will be
displayed within your product loops (IE on product categories, up sells, related products etc)
and the initial focus of the image gallery on your product details page
Adding product galleries
Product galleries simply display all images attached to a product, with the Featured Image
being the primary image.
You can create a product gallery using the same method as adding a featured image, rather
using the Product Gallery Meta box instead.
Re-order and removing images from product galleries
Images in the product gallery can be re-ordered easily via drag and drop. Simply re-order
your images by moving them around.
To remove an image from the product gallery, hover over the image and click on the red “x”
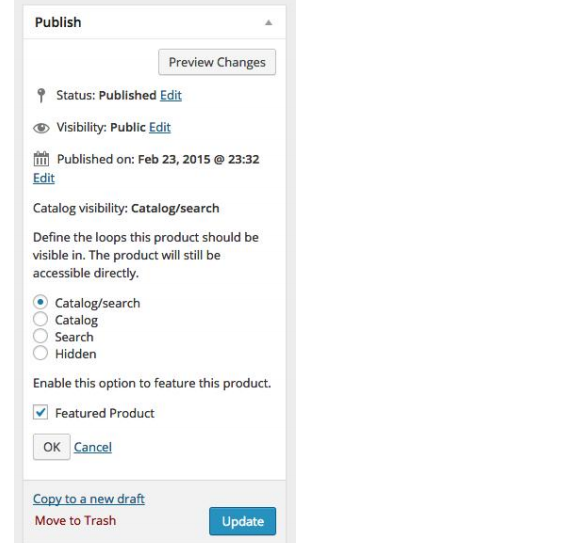
Setting catalog visibility and feature status
In the publish panel, you can set catalog visibility for your product
Visibility can be set to:
Catalog and search – visible everywhere
Catalog – visible in catalog loops, but not search
Search – visible in search results, but not in the catalog (categories/shop page)
Hidden – only visible on the single product page – not in any product loops
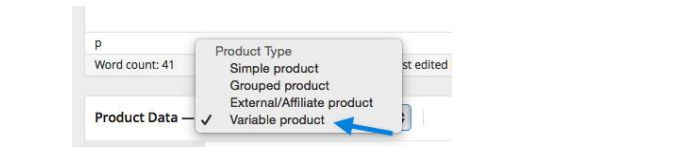
Adding a variable product
Variable products are arguably the most complex of product types. They let you define
variations of a single product where each variation may have a different SKU, price or stock
level.
Variable products are a product type in WooCommerce that lets you offer a set of
variations on a product with control over prices, stock, image, and more for each variation.
They can be used for a product like a shirt where you can offer a large t-shirt vs a small tshirt.
WooCommerce User Manual
www.designnbuy.com Page 41
Adding attributes for variations
To add a variable product, either edit an existing product or create a new one by going to:
Products > Products. You can select the Add Product button or edit an existing product from
there. Once in a product select the Variable product from the Product Data dropdown.
Orders are created when a customer completes the checkout process and are visible by
Admin and Shop Manager Users only. Each order is given a unique Order ID.
An order also has a status. The order statuses let you know how far along the order is,
starting from pending and ending with complete. The following order statuses are used:

When you start taking orders the order management page will begin to fill up. You can view
these orders by going to WooCommerce > Orders in the left hand admin menu.
Each order row displays useful details, such as the customer’s address, email, telephone
number, and the order status. You can click the order number or the ‘view order’ button to
see the single order page (this is also where you can edit the order details and update the
status).
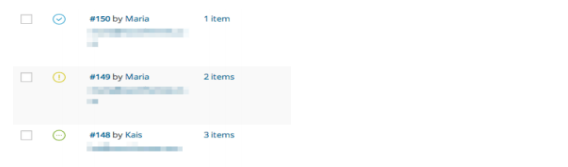
Order rows also have some handy shortcut buttons to quickly mark orders complete and
processing.
You can filter the list of displayed orders by date, status and customer by using the form at the top of the screen.
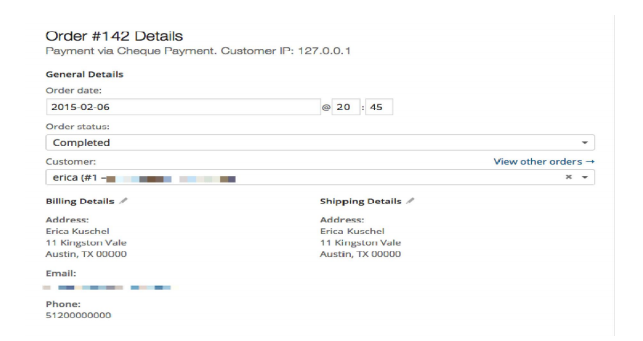
Editing/viewing single orders
From the single order page not only can you view all order data, you can edit and update it.
You can:
Order Data
The order data panel lets you modify the order status, view (or change) the customer’s
order note, and change which user the order is assigned to.
You’ll also find the customers billing and shipping addresses, along with a link to view other
purchases the customer may have had in the past. To edit addresses, click ‘edit’ and a form
will appear. Once saved, the new address will be displayed in a localized format.
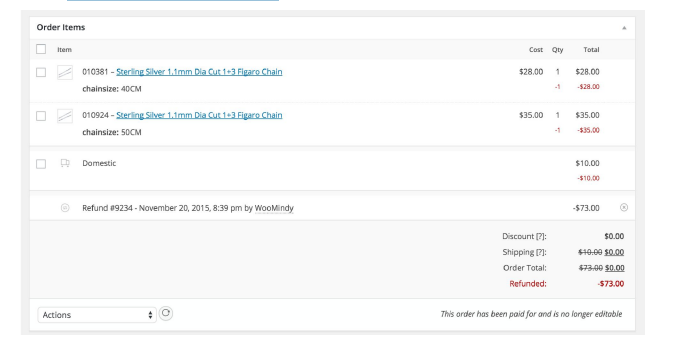
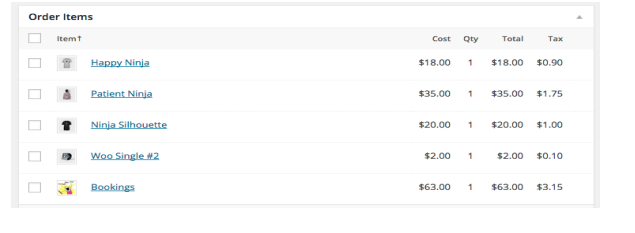
Order Items
Please note: To edit the order, the status must be set to On Hold or Processing Payment.
The next panel on the order page is the order items panel. This panel lists items which are in the
order, as well as quantities and prices.
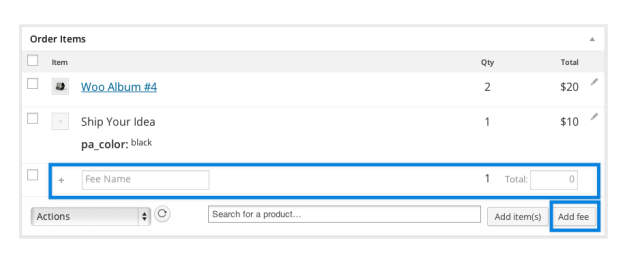
Order Totals
The Order Totals panel stores totals and tax for the order. You can enter these values
yourself or have them part calculated for you using the ‘calc totals’ button. The totals
comprise of the following:
There are two buttons available on this panel – calc taxes and calc totals. Calculating taxes
will use your prices, and calculate the tax based on the customers shipping address. If the
customer’s address has not been input, it will default to the stores base location.
There is also a section called tax rows. This is where you can define (and name) multiple tax
rows. This is useful if, for example, you take multiple taxes or use compound taxes. These
values are displayed on the customer invoice.
Adding an order manually
Add an order using the ‘Add New’ link at the top of the orders page. Once added you can
input the customer details, add line items, and calculate the totals. You should set a
relevant status for the new order – if it needs to be paid use ‘pending’.
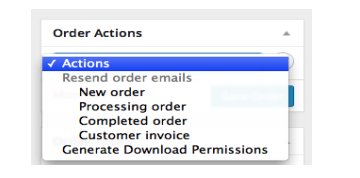
After saving, you can use the Order Actions dropdown to email the Customer Invoice with
payment instructions. To send, be sure to select Save Order
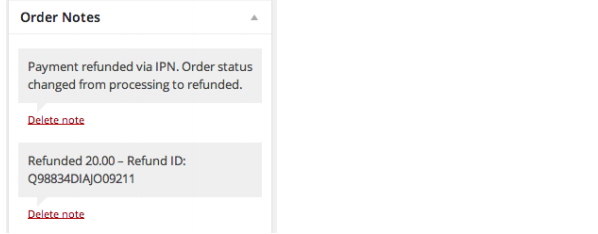
Order/Customer Notes
The ‘Order Notes’ panel displays notes attached to the order. These are used for storing
event details, such as payment results or reducing stock levels, and for adding notes to the
order for customers to view. Some payment gateways also add notes for debugging.
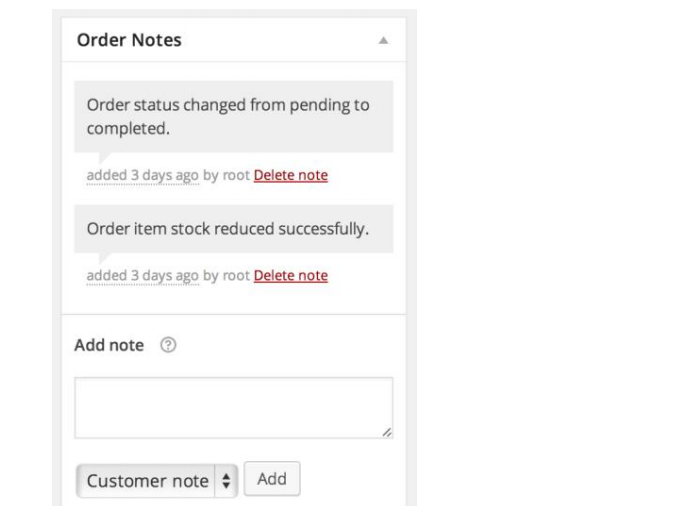
The notes panel – for internal use, or notifying customers The notes feature can be a very powerful tool for communicating with customers. Need to
add a tracking number for shipping? Some stock is delayed? Add a customer note and they
will be automatically notified. When added, customer notes are highlighted in purple. Customers receive notes via email,
but can view them by viewing an order, or using the WooCommerce order tracking page.
Refunding Orders
Starting with WooCommerce 2.2+, it is now possible to do refunds directly from
WooCommerce if your payment gateway allows it.
Automatic Refunds
If your payment gateway supports automatic refunds, there will be new settings in
your gateway’s settings to fill in. Make sure those are setup correctly or refunds won’t work
as they should. Refunds extend to products, taxes, and shipping fees and can be processed
through your order page.
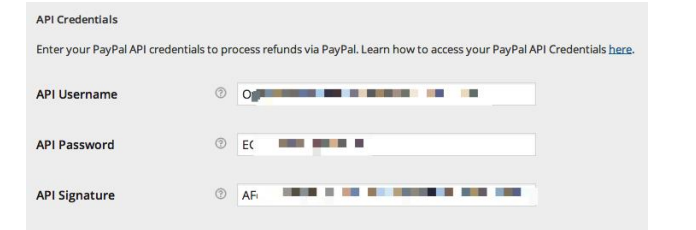
Here is an example of the settings you would see when you go to WooCommerce > Settings
> Checkout > Your Payment Gateway if your Payment Gateway supports automatic refunds.
Adding the API keys in your Payment Gateway settings will allow for quick, automatic
refunds through the WooCommerce admin interface. Next see the steps below on how to
process a refund on an order.
Video Player
1. Go to: WooCommerce > Orders
2. Select the order you wish to refund.
3. Click the grey Refund button to start.
4. Specify the quantity of the product(s) to be refunded in the text box(es) that appear
for each line item. The refund amount will automatically adjust based on the
products refunded. If inventory levels are not managed, you can also simply enter
the Refund amount, without adjusting the product quantity. If the quantities of items are not set when issuing a refund then the order is not marked as refunded
and the email that is sent will say “partial refund.”
5. Add refund notes, if desired.
6. Click Refund $X via [Your Gateway]